
@/Arpro Erp Manual Calendars and Barcode


PRODUCTION CALENDAR

Used in the context of production plans for the calculation of material requirements, then for the generation of production movements (launches).
In the latter they play a key role in connection with external tasking programs, such as Microsoft Project®, for which we can provide integration parts and customizations dedicated to the needs.
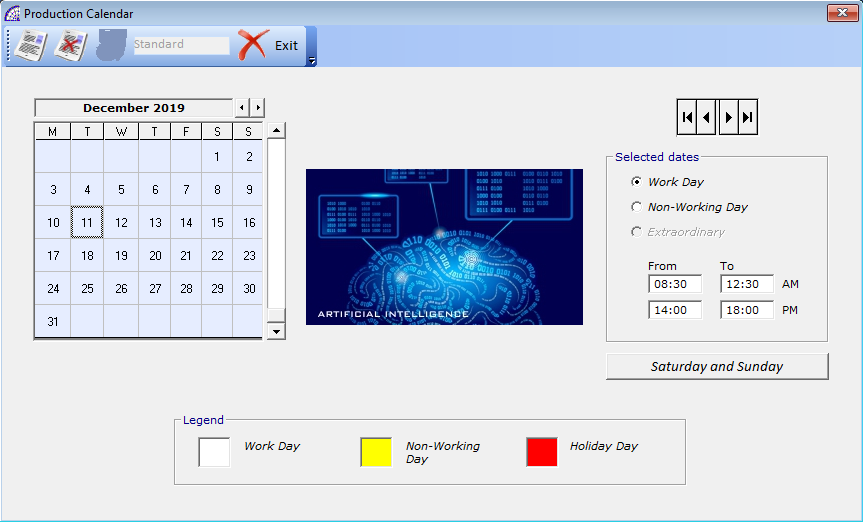
For each calendar you can define working days, non-working days and holidays. The program provides a predefined calendar called “Standard”.
Simply select the year, month, day in the left grid, then the corresponding option in the “Select Dates” frame: Work Day, Non-Working Day.
With regard to the “Work Day” it is finally necessary to define the daily working time: From … to … (AM/PM).
It is possible to use the “Saturday and Sunday” button to re-enter the weekly weekdays. This functionality should be used if a standard value reset is needed or because a new production calendar has been created, to which the standard needs to be defined.
Toolbar
BARCODES

A window dedicated to the setting of the reference barcode, in the context of the program, for the management of labels or systems for detecting production times.
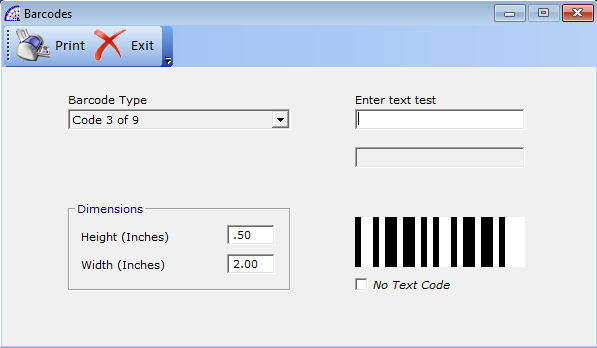
You have to choose the type of barcode (Barcode Type), among the existing ones, then you have to define the dimensions in inches (Height and Width).
In the “Enter Text test” field it is possible to enter a test text manually to obtain the graphic result corresponding to the selected barcode.
The “No Text Code” flag allows activating/deactivating the corresponding text in the printout of the various barcodes.
PRINT, LABEL CONFIGURATION
Please refer to the @/Arpro program manual for the relevant section.
Raccogli la nostra proposta
Aggregati al gruppo delle +17.000 aziende soddisfatte e ottieni risposte su come migliorare la tua attività.
© 2024 Arpro Solutions, LLC | All Rights Reserved | Terms of Use & Privacy Policy, Cookies
